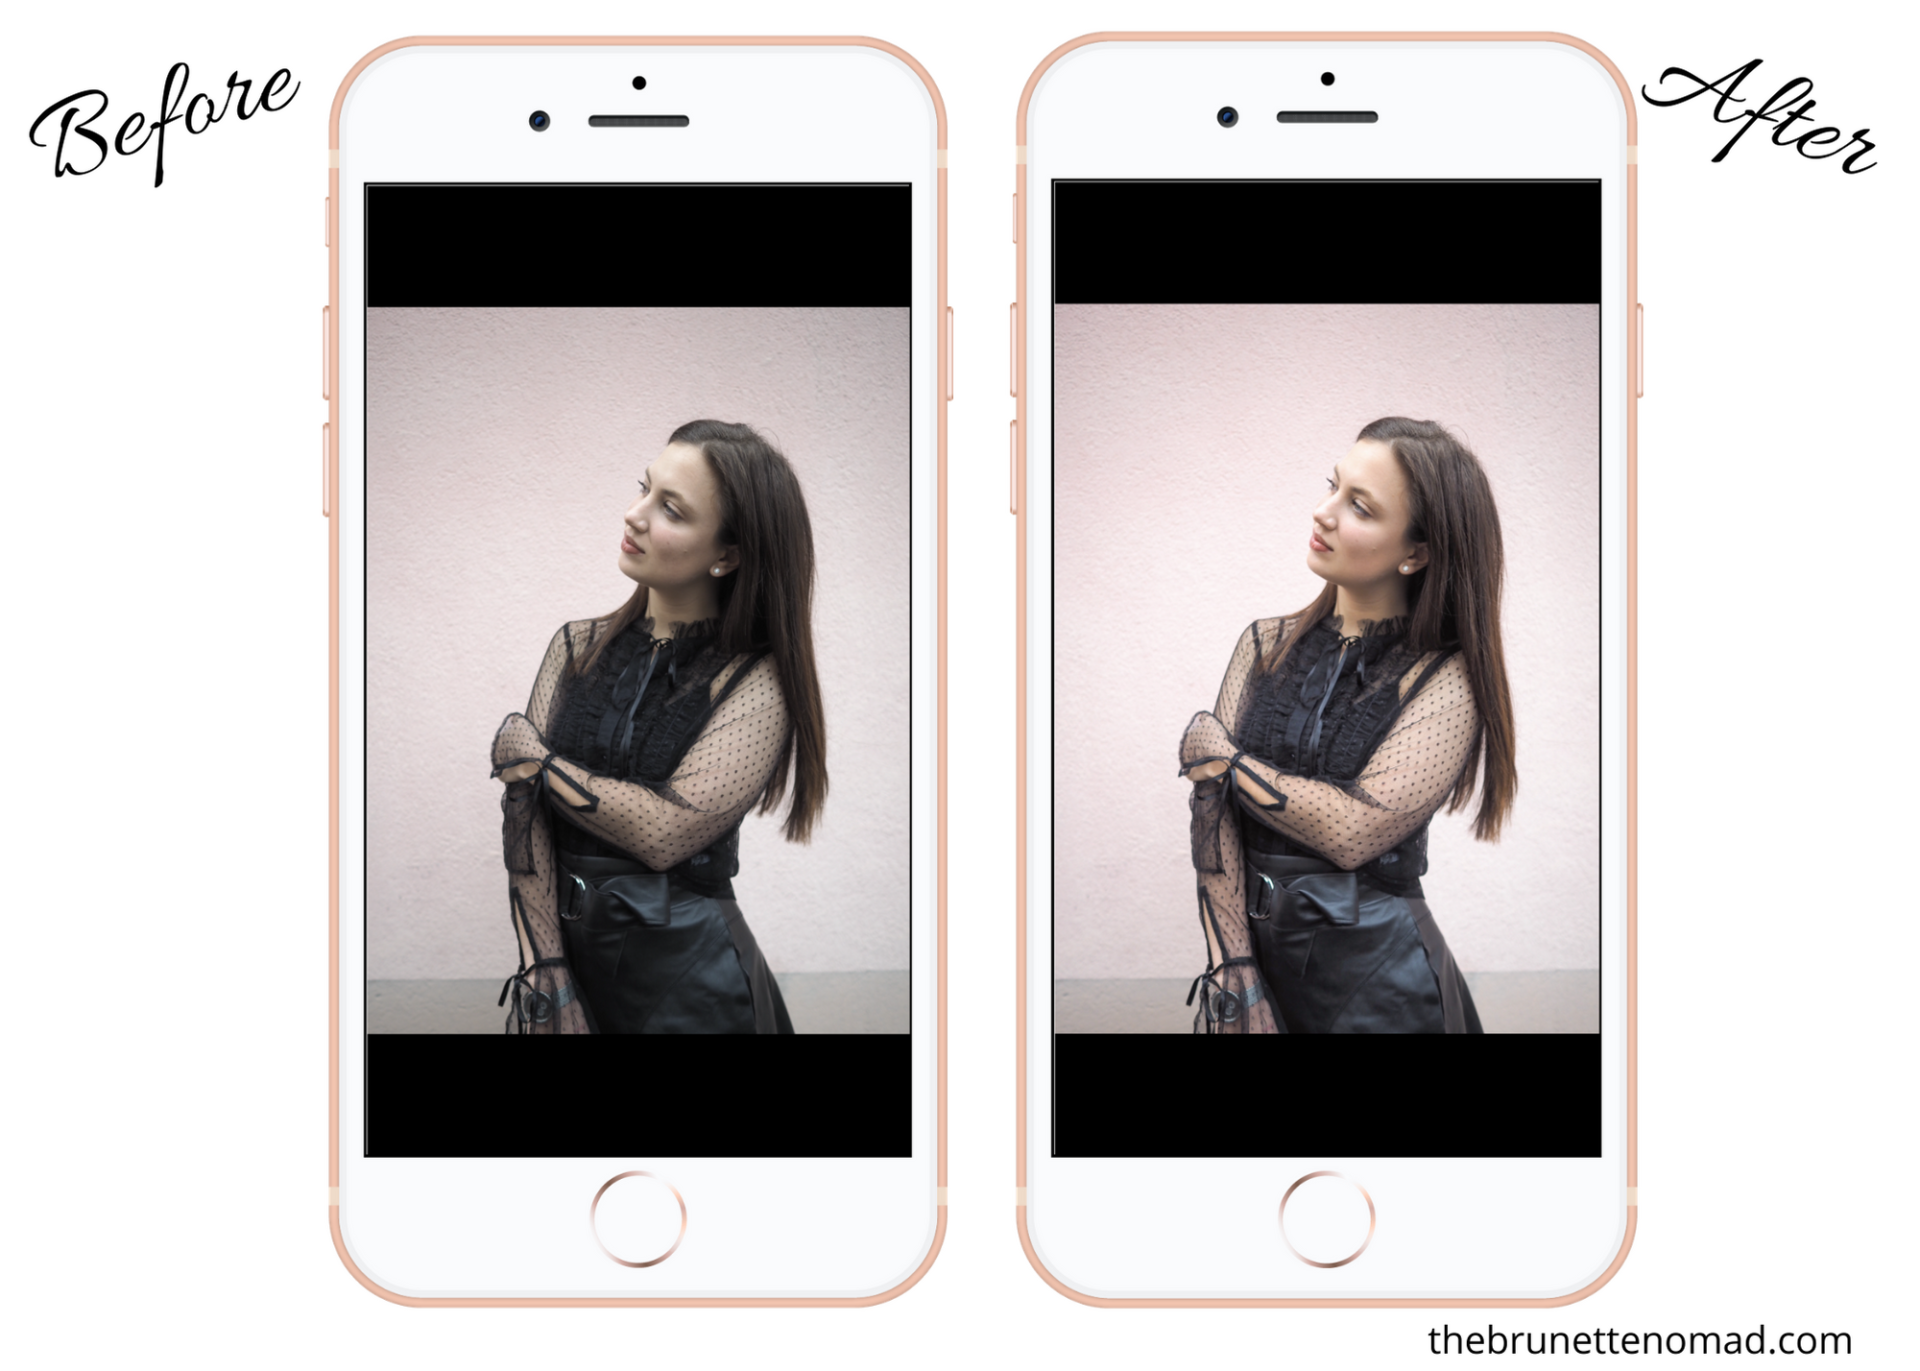
I previously wrote about how I edit my Instagram photos, but a lot has changed since then. My process is streamlined, and it truly takes only a few minutes to edit. The caption, engaging, hashtags, and more…well, that’s another story. If you’re outside of the content creator world you would be surprised what actually goes into an Instagram post.
That is why I love these types of blog posts.
This industry is still a mystery to many so if I can peel back the curtain even just a little bit then I’m happy to do so. If you’re a content creator yourself and just interested in learning new ways to edit Instagram photos or you’re someone who is curious about the process it takes then continue reading.
While I love to edit my photos so they are enhanced and provide some uniformity on my feed, I always strive to keep my photos natural and pretty close to the original. I would hope that if I went missing you all would know what I look like and not be searching for the Instagram version of me.
In this post, I’ll be going over the apps I use (in order), and how I created my own Lightroom preset to edit my Instagram photos just the way I like them.
HOW I EDIT MY INSTAGRAM PHOTOS
LIGHTROOM MOBILE – FREE
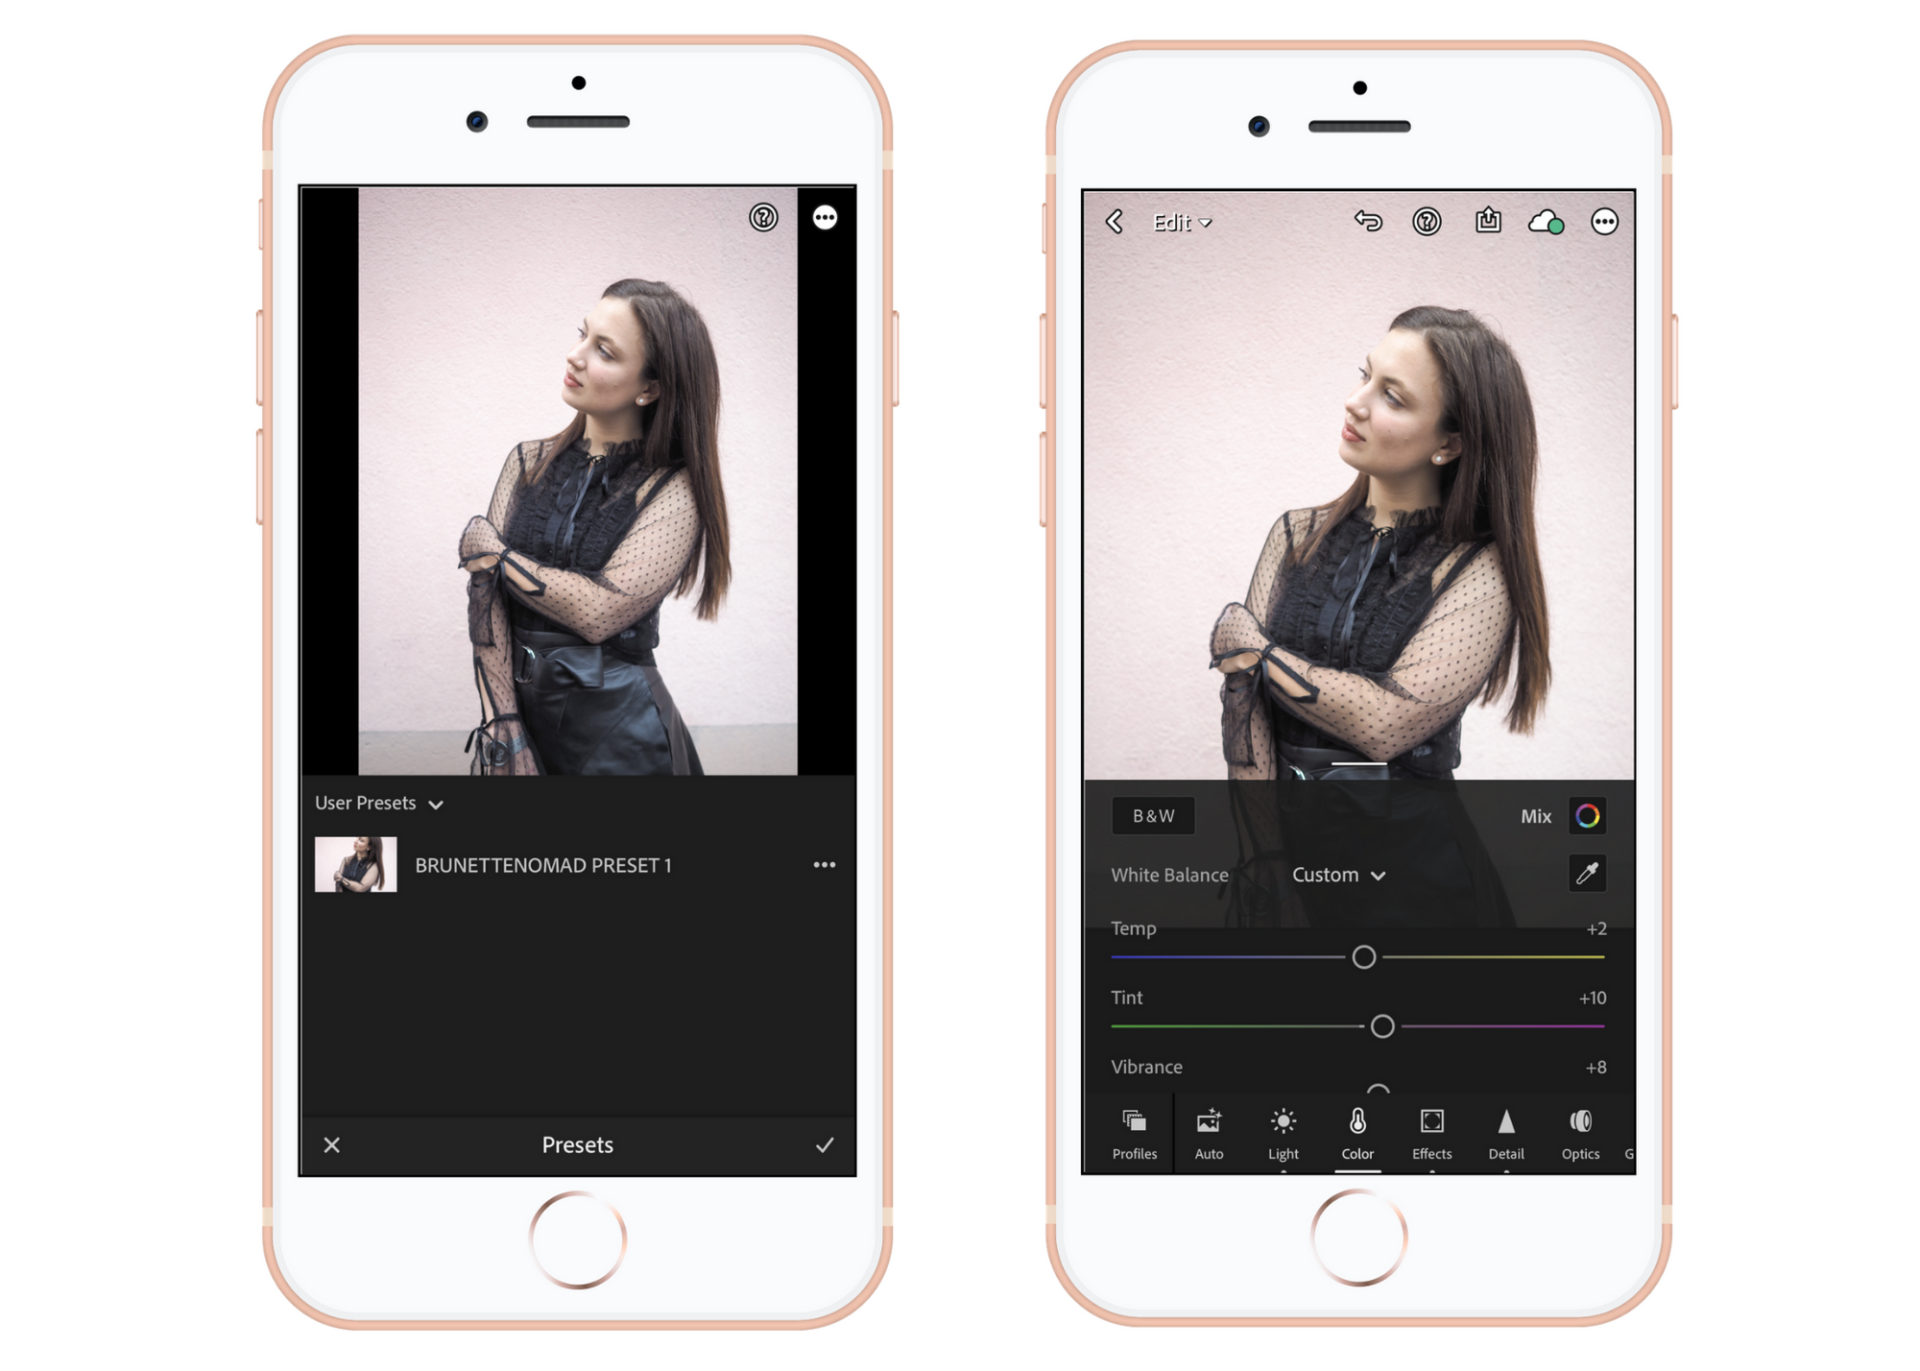
Lightroom is probably one of the most common apps used by bloggers to edit their Instagram photos and for a good reason. You can purchase presets online, but I prefer to create my own.
Once I apply my own preset, I go to the color tab to edit the “temp” and “tint” max +/- 2 because some photos are naturally a bit too pink or a bit too yellow. However, I created a preset that seems to naturally fit with most of my photos.
If you want to create your own preset you can do it right in the app. I suggest gathering some of your favorite photos in your ideal setting and play around with every tab until you find a setting that seems to work for most.
Click here if you’re interested in purchasing my Lightroom preset that I use to edit all of my Instagram photos – it’s only $5!
FACETUNE – FREE
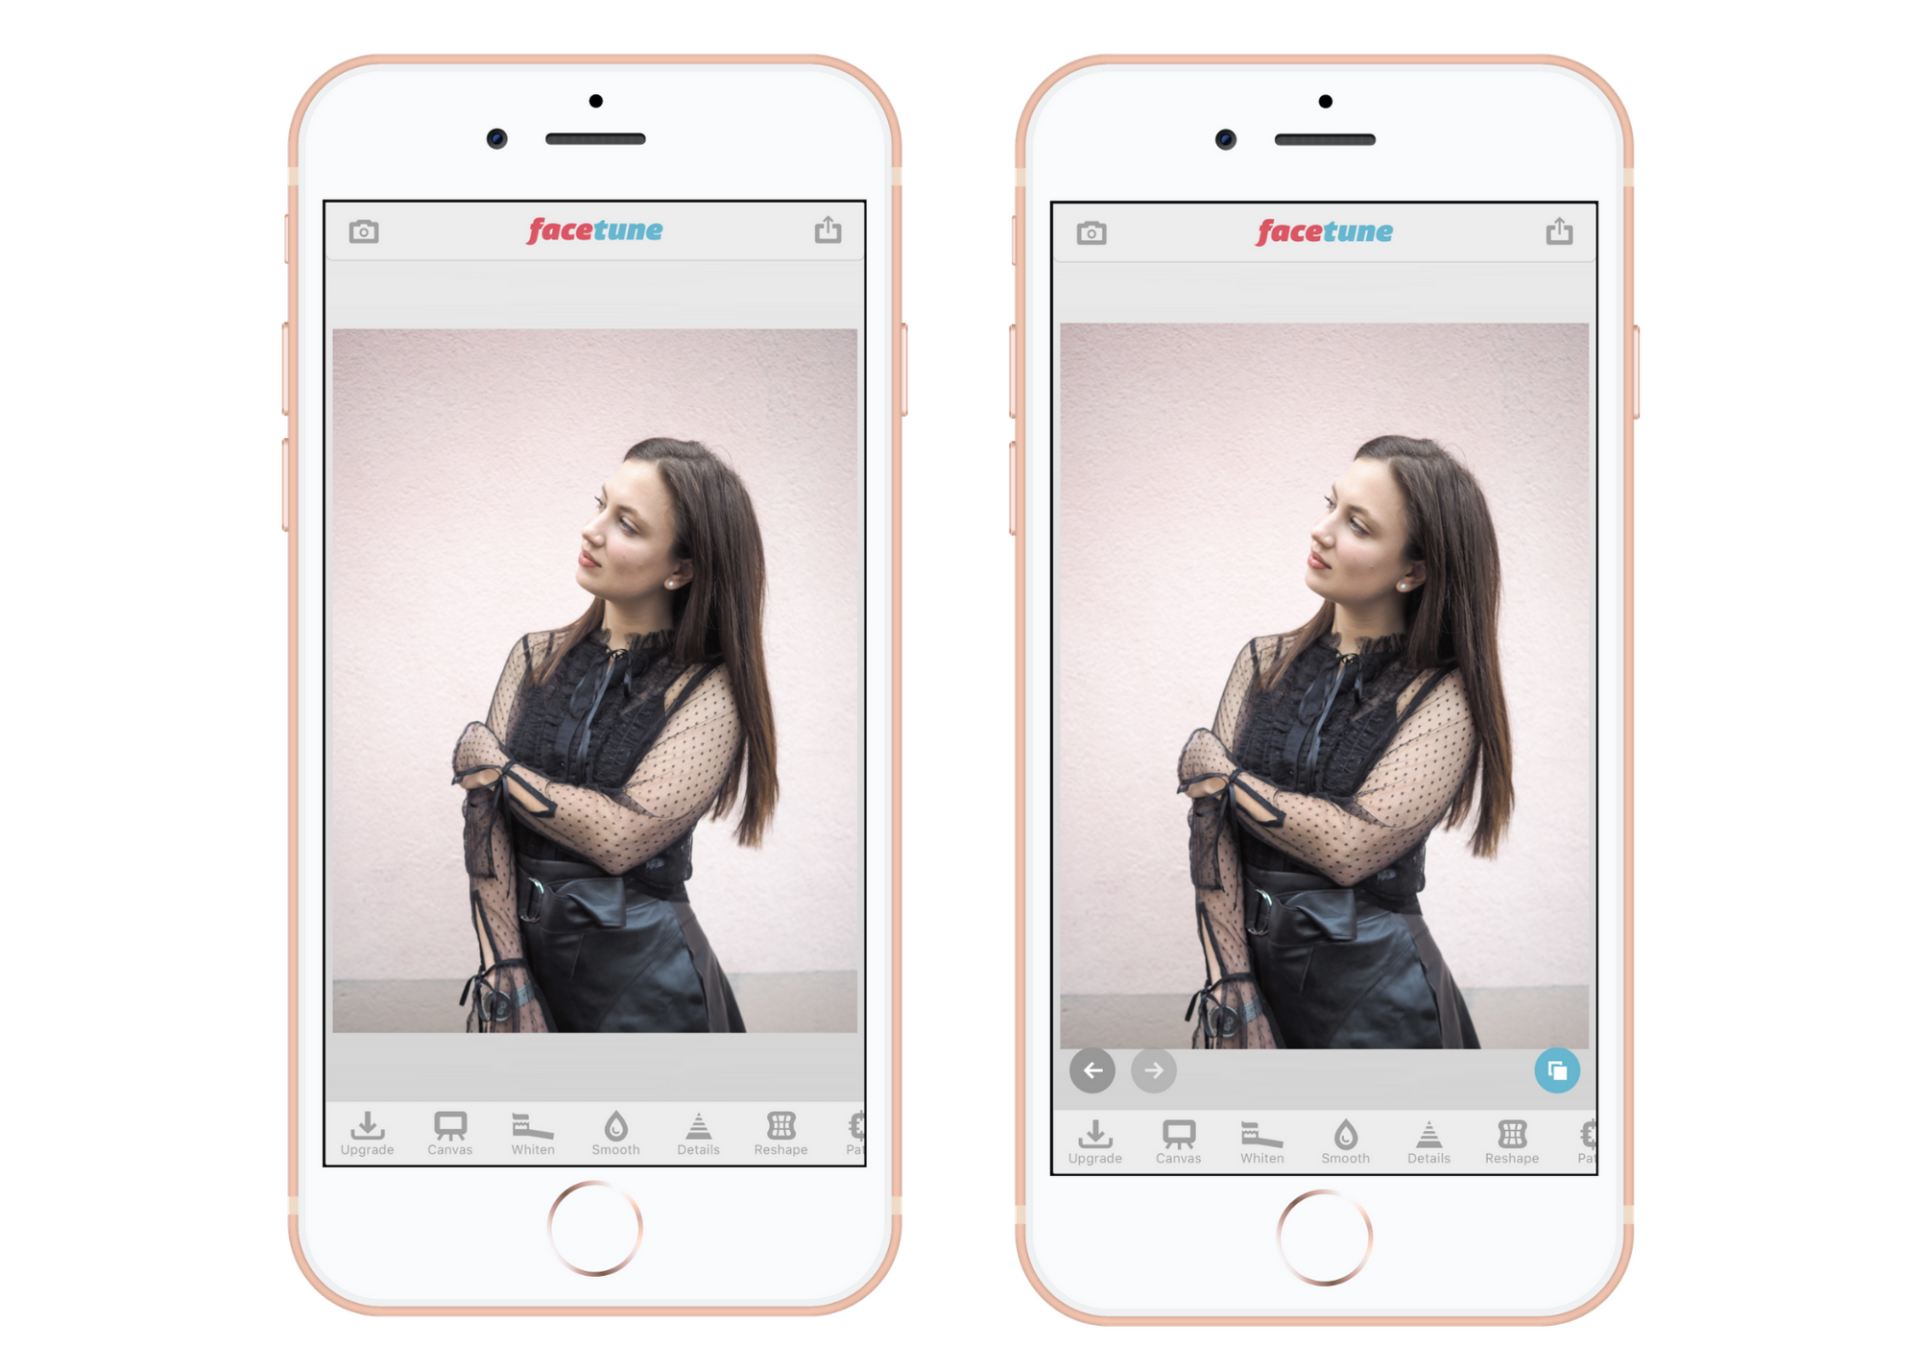
I feel like this app gets a bad wrap, but I love it! It can be used to naturally edit photos so your skin looks better, eyes look whiter, and wrinkles can be ironed out. Nothing is more annoying than when you have a great photo, but your shirt is completely wrinkled.
I use this app to cover up any acne spots, smooth out my skin slightly, detail my eyelashes so they look bolder or bring out details on my outfit. In this photo, I enhanced the details on my top and skirt, and lightly on my hair.
I also use the white tool to make the whites of my eyes brighter (great for selfies) or if there are any white items displayed in the photo like a coffee cup or a pair of white booties.
Additional Apps:
I would say 90% of the time I am done editing my photo with the two apps above. I told you this routine was simple. However, sometimes a photo still isn’t quite right. These are apps that I only use if I want to bring out the tones of a certain color, look tanner, or if a photo was a little overexposed.
DARKROOM – FREE
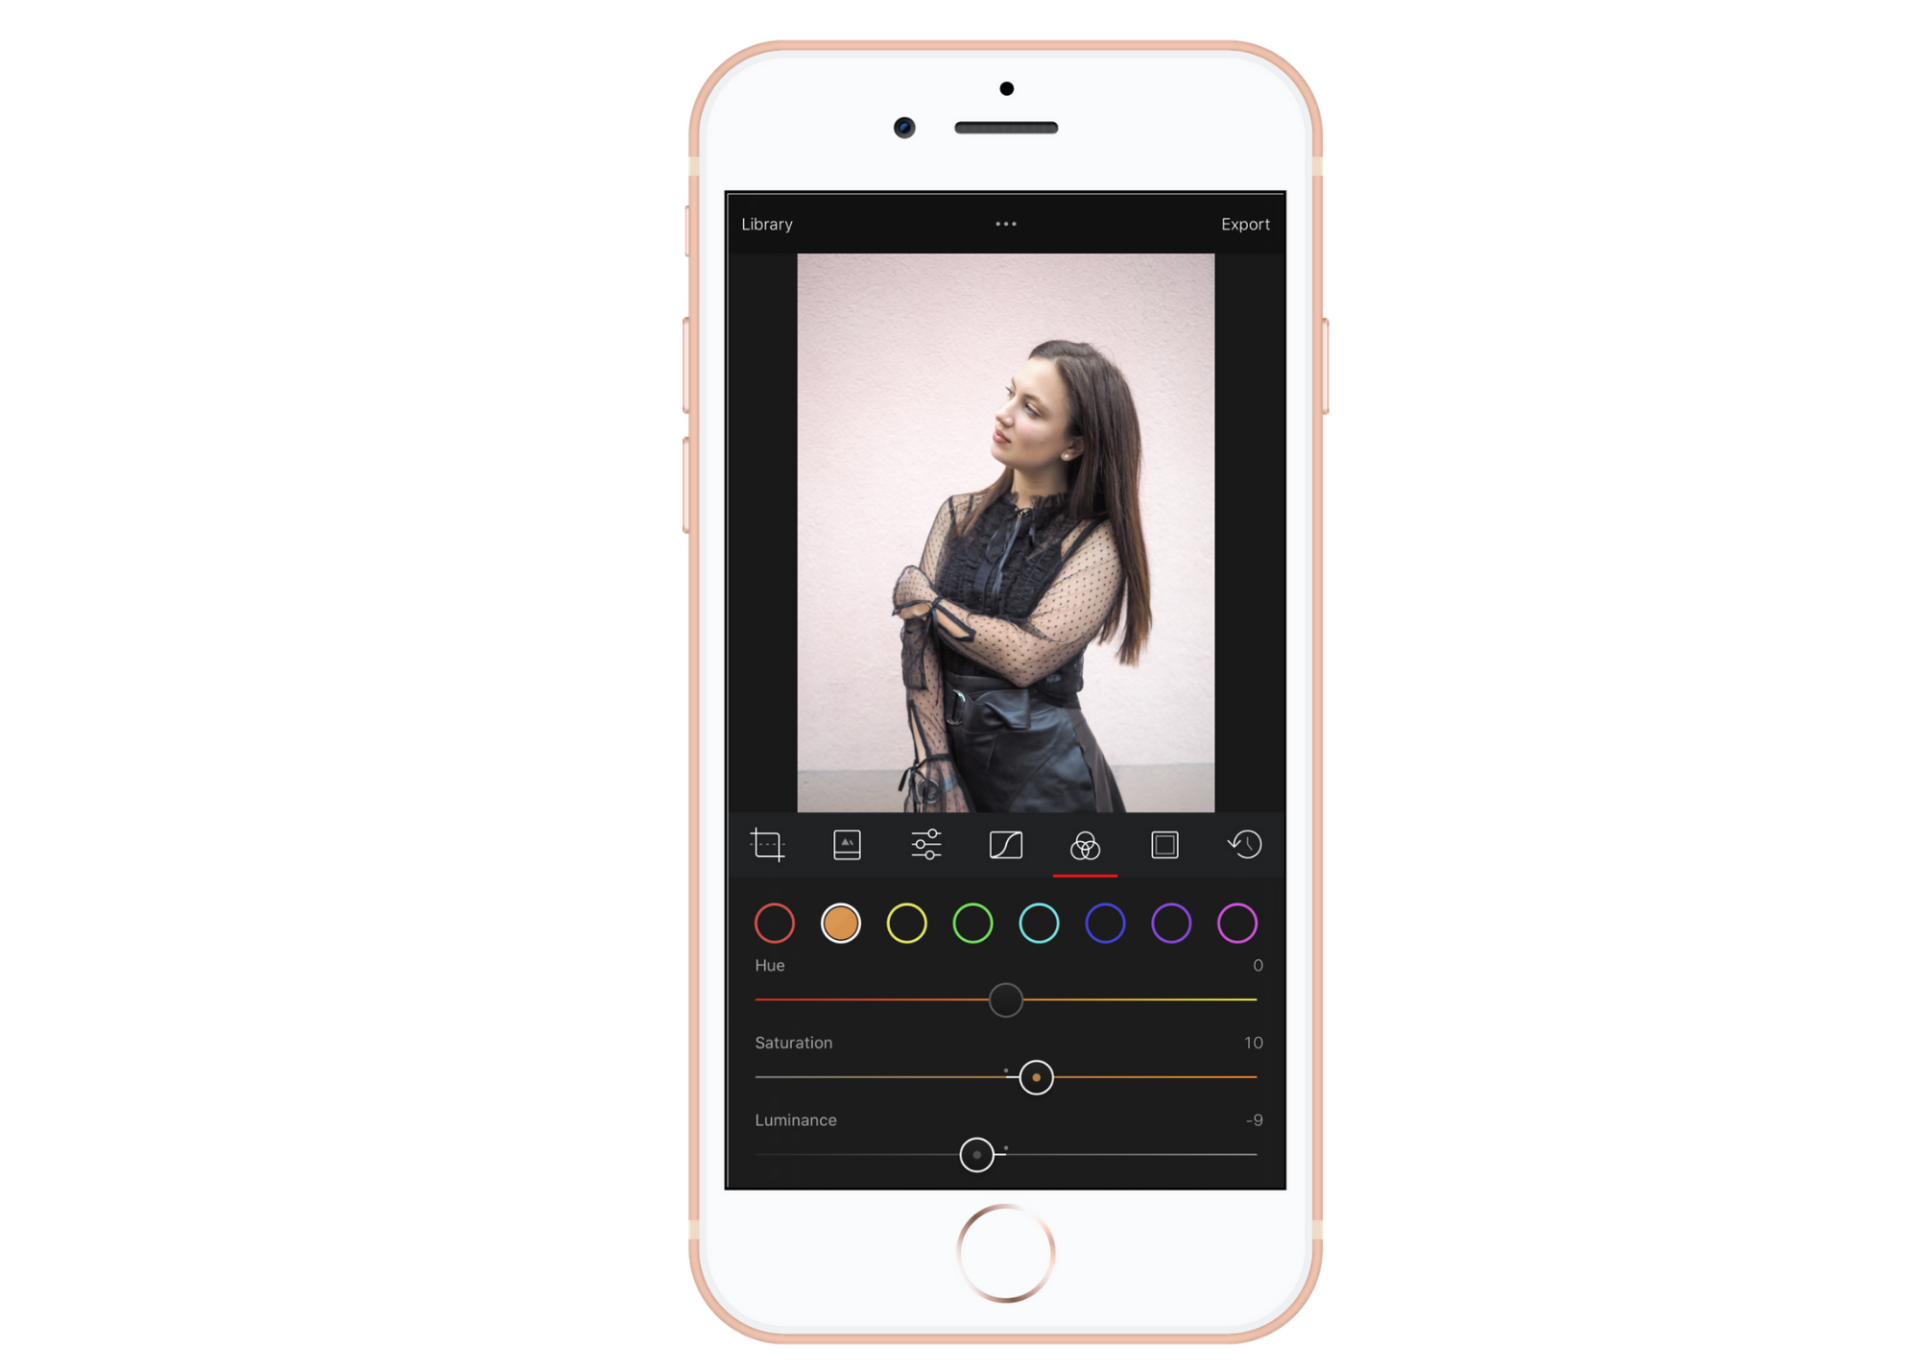
If I am looking a bit pale and want to enhance my skin tone this is the app I use. It is also great to bring out specific colors. Say you’re wearing a pink dress and you want to enhance the shade this is a great app to use for that.
If you want to look a bit tanner –
I focus on the orange and red tones. The Saturation and Luminance tabs will be your best friend. I up the saturation slightly (in this photo +10), and turn down the luminance (in this photo -9) to create a deeper color. Many forget about the luminance tab but it really makes a big difference.
SNAPSEED – FREE
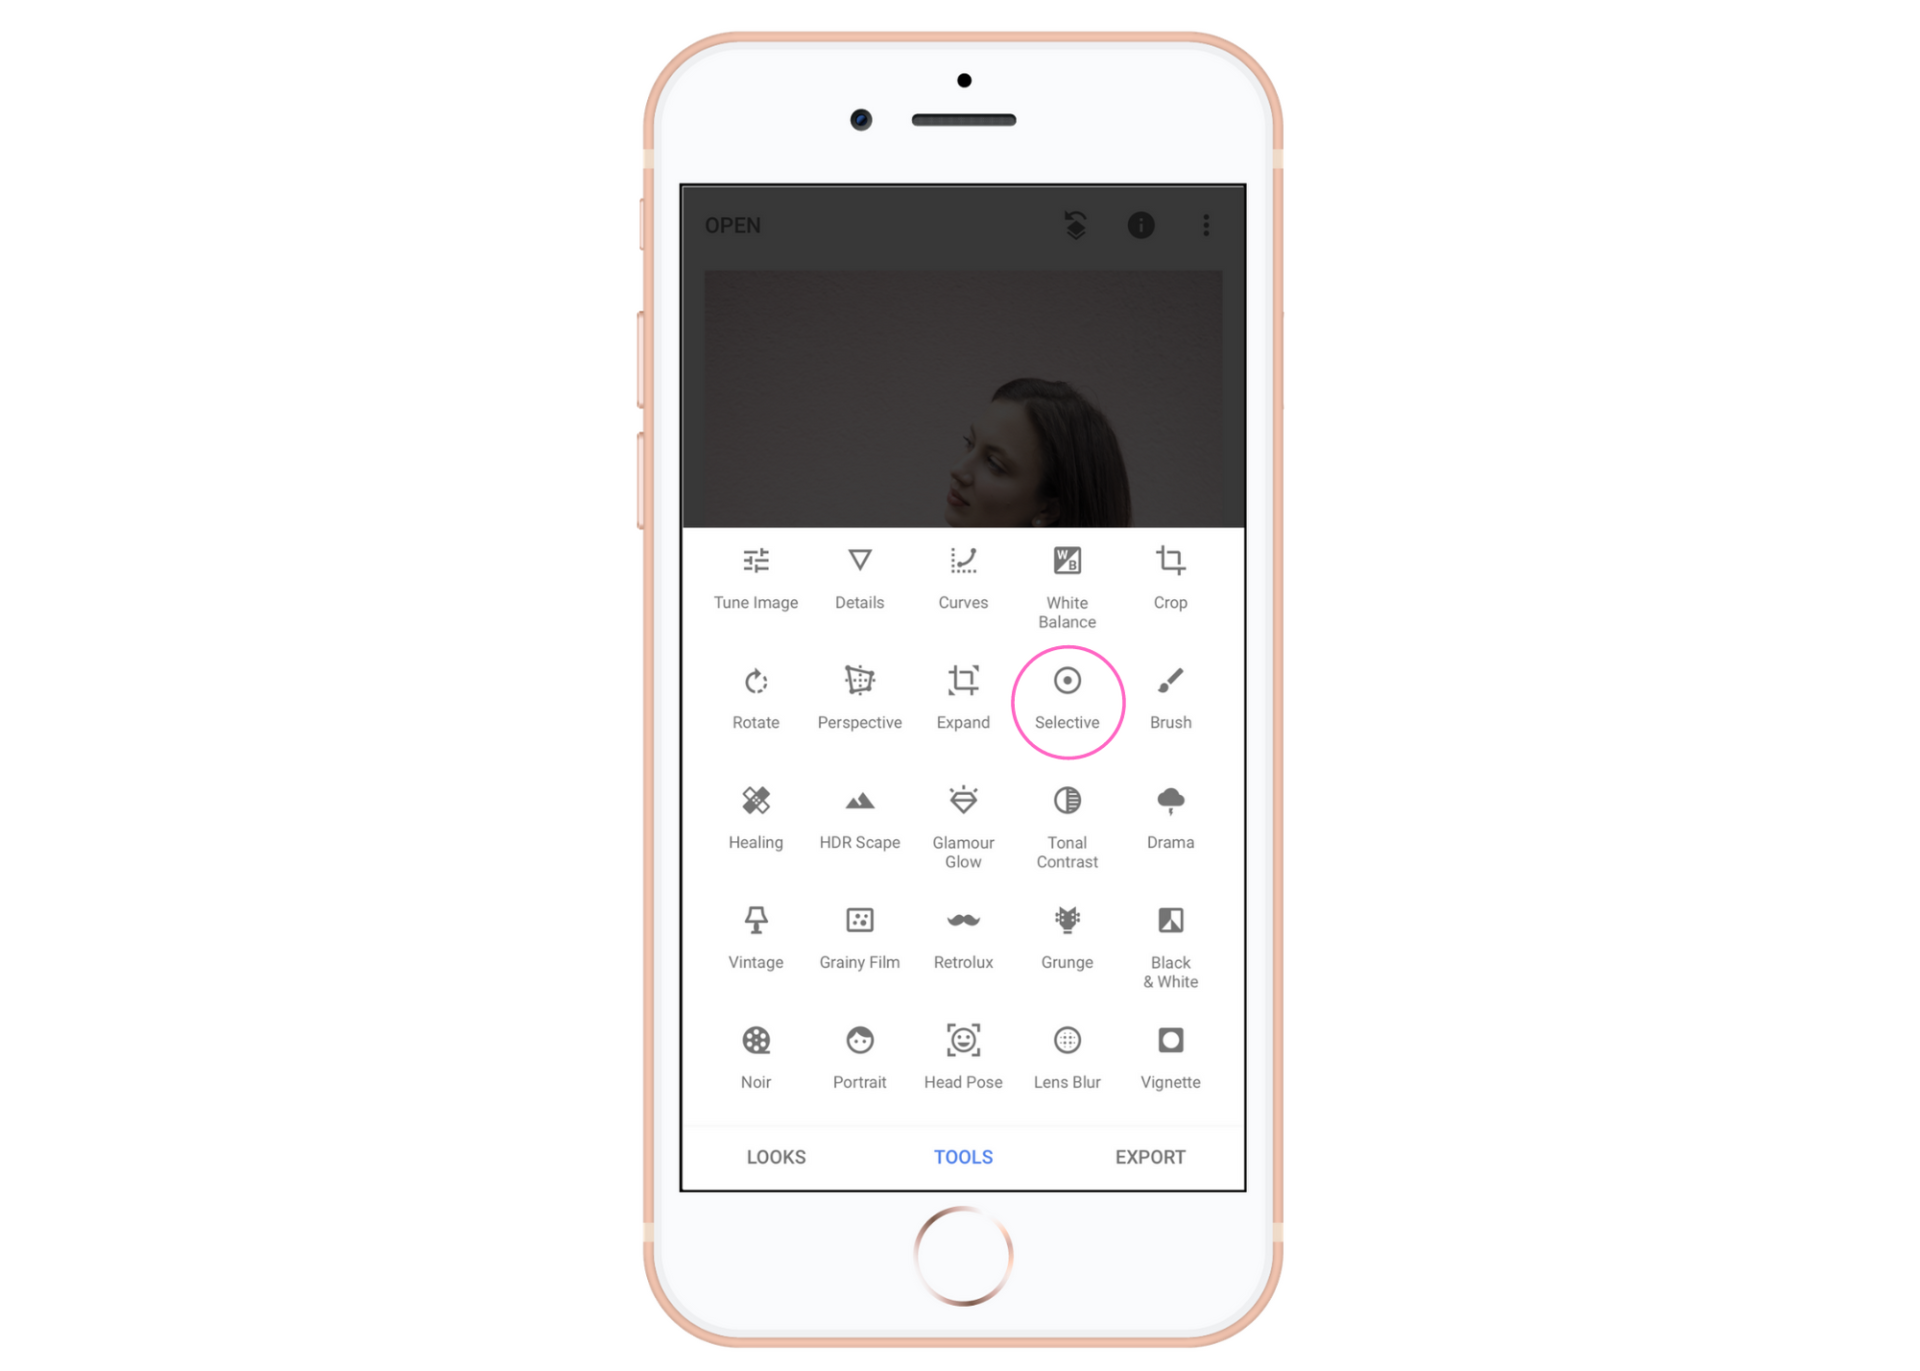
In this app, I only use the “Selective” tool from the main menu. You can alter brightness, saturation, contrast, and structure (detail) of a specific area. Most apps will change the entire photo, but I love that I can select my face if I want it to be a little brighter or a handbag that I want to enhance the brightness or saturation of and no other area in the photo.
That’s it! Now you know how I edit my Instagram photos. There are so many out there who create stunning images and are much better at editing photos than I am, but I just love a simple process. If you’re a blogger, what apps do you use to edit your Instagram photos? Let me know in the comment section below!
These are cool tips!!! Helpful as I am trying to improve my photos too.
Author
So happy you liked this!
Exactly what I was looking for, thank you! Didn’t know about Darkroom, def gonna check out!
These are awesome tips! I use Snapseed. I’ll try the others as well. Pinning.
Author
Thanks so much Cindy! I really appreciate that and I’m so happy you found this useful. That’s what I was hoping for xoxo
Thank you for sharing! I have never heard of Darkroom and I really could use it to help with my skin tone! Sometimes I feel like I look so washed out in my photos!
Tracy
https://www.findyourdazzle.com
Author
So happy you found this useful! Darkroom is great to give a tan, especially during the winter months 🙂
Thank you for sharing! very helpful!
Author
So happy you found this post helpful! Thanks for reading xoxo
That is super easy! I haven’t really tried making my own presets but I probably should. The ones that I use sometimes are too bright or overdone for it to look right on every photo that I want to post.
Author
It took time to find the exact way I wanted my preset to look, but creating it definitely wasn’t hard. I am actually selling my preset now for $5 (under my shop tab) if you’re interested. Wanted to make it easier for everyone. No pressure 🙂
These are great recommendations! I’ve only heard of Lightroom, but none of the others. I will check them out. Thanks.
Author
So happy to help! That is exactly what I was going for 🙂